Garden sauna foundations: the ABC guide to choosing foundations for your garden sauna
5.9.2025

Foundations for a garden sauna or cabin – a guide to choosing the right foundations

Ville Laitila, Managing Director, Ehta

Ville Laitila

Ehta is the CEO and Sauna Master. Outside of the sauna, he spends his best moments on forest paths, orienteering courses, and the ice hockey rink.

Laying the foundations is the first and a very important stage on a cabin or sauna building site. The foundations of a garden sauna or cabin are literally the basis of everything, and they are difficult to fix afterwards. Proper foundations ensure that the building stands the test of time and does not, for example, twist or sink.

Building the foundations involves three stages:

  1. Soil survey and choice of foundation type.
  2. Designing the foundations
  3. Building the foundations

The building's location and the soil at the site have a major effect on the choice of foundation type, so the work always starts with a soil survey.

In this guide you will find clear information on choosing the right foundations, as well as instructions for building different types of foundations.

👉 Also read why winter delivery is worth it and how it affects building the foundations.

A soil survey forms the basis for choosing the foundations of both a cabin and a garden sauna.

A soil survey forms the basis for choosing the foundations of a cabin or garden sauna. If the composition of the soil is not known, a soil survey is the first step towards your dream sauna.

A soil survey can be commissioned from a professional or done yourself. Previous owners of the property can also give valuable information about the soil. The aim of the survey is to determine the soil's composition, load-bearing capacity and groundwater level.

Every type of soil behaves differently:

  • in some, water drains down quickly,
  • others retain moisture,
  • some soil types are highly susceptible to frost heave,
  • others hardly at all.

In Finland, it is precisely the behaviour of moisture and frost heave that pose the greatest risks to foundations. The power of nature is remarkable: frost heave shifts soil particles both vertically and sideways – even with a heavy building on top. That is why a wrongly chosen or poorly built foundation can result in the building sinking or its structures breaking.

Soil types and how they affect the choice of foundations.

The most common ways to lay the foundations for a cabin or garden sauna are ground screw, pier and lightweight foundations. They are used as follows, depending on the soil:

See the table for which foundation suits which soil:

 Ground screw foundationPier foundation
Bedrock–x
Sand/gravelxx
Morainex*x
Fine sand/siltxx
Clayxx
Peat/mud**––

* Moraine may contain large stones that hinder the installation of ground screws.

** Peat, mud and other organic soil must always be removed from beneath the foundations.

In our experience, the traditional pier foundation is by far the most common foundation type.

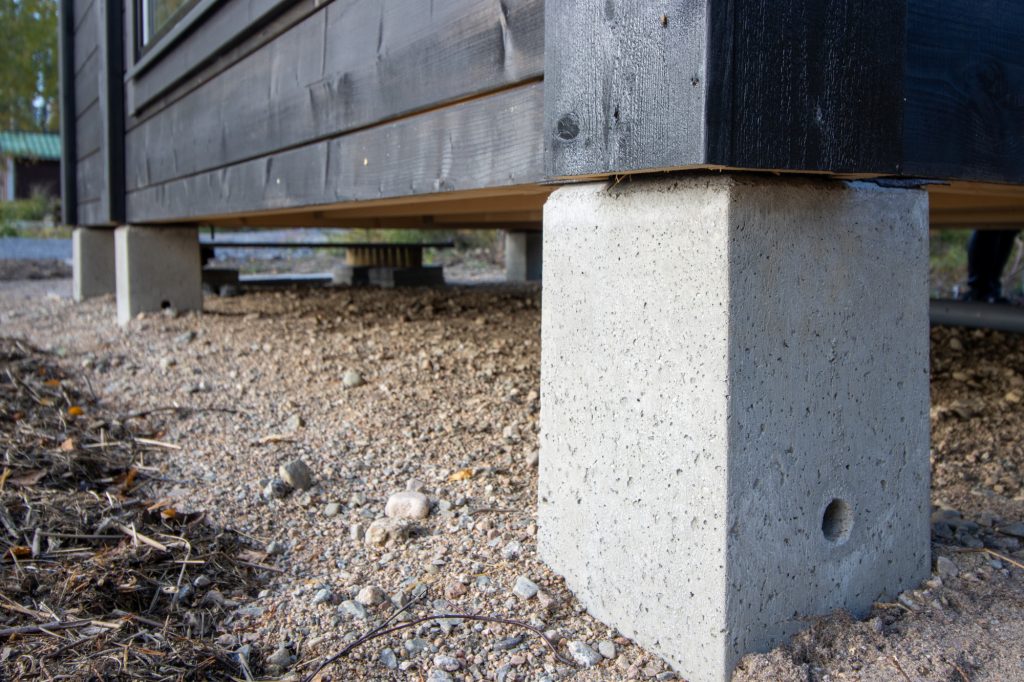
A grey foundation pier under the corner of a dark log garden sauna.
The most popular foundation type is the pier foundation. A ventilated floor structure helps with moisture control in a garden sauna or sauna cabin.

How to choose the right foundations for your cabin or sauna – instructions and costs

In the end, the foundation for a sauna or cabin is chosen according to the soil, factors skills and preferences . Once the composition of the soil is known, the final choice can be made taking the other factors into account.

A garden sauna or cabin is usually built on a ground screw or pier foundation; where the soil allows, a lightweight foundation is also an option.

But how do you make the right choice? And how much do foundations cost?

You will get the answers shortly, as next we give you easy-to-understand information on the three most common foundation types.

1. Ground screw foundation

A ground screw foundation is a newer alternative to a traditional concrete or block foundation. A ground screw, also called a screw pile, is a steel pile that is screwed into the ground below the frost line.

Ground screws come in hand-turned lighter model that you can install yourself, and a heavier machine-installed model. You can hire the machine or buy the ground screws ready installed.

A ground screw foundation does not require extensive earthworks and screws can also be installed in cramped, hard-to-reach sites and in damp soil, as long as the length of the ground screw is chosen correctly. The screw must be installed below the frost line, so that it stays in place.

Ground screws are not suitable for rocky or stony ground, as they are screwed into the soil, and larger stones prevent the screw from being installed. If you still want a ground screw foundation, you can have the stones at the screw positions removed with an excavator and replaced with more even soil. However, this is likely to cost more than, for example, a pier foundation.

Suitability:

+ Clay soil, silt, moraine
+ Suitable for all Ehta garden saunas, sauna cabins and cabins.

– Not suitable for rocky or stony ground.

Construction:

+ Leaves no marks in the garden.
+ Can also be installed in winter.
+ A quick foundation type – no drying time.
+ The hand-installed model in particular is inexpensive.

– In some cases, can be more expensive than a pier foundation when installed by a professional.

Options and costs:

  • Hand-turned ground screws for self-installation are available at all hardware stores.
    • Price of the screws: 20-60€ each.
      (Remember to choose a screw long enough to reach below the frost line!)
  • Machine-installed ground screws are usually installed by a professional. (e.g. Stop digging operates throughout Finland.)
    • Price per screw, installed: approx. 200–300 € each (the location of the site can have a significant effect on costs!)
  • Machine installation, DIY
    • Price of the screws: 30-80€ each;
    • machine hire, e.g. from a hardware store: 80-150€/day.
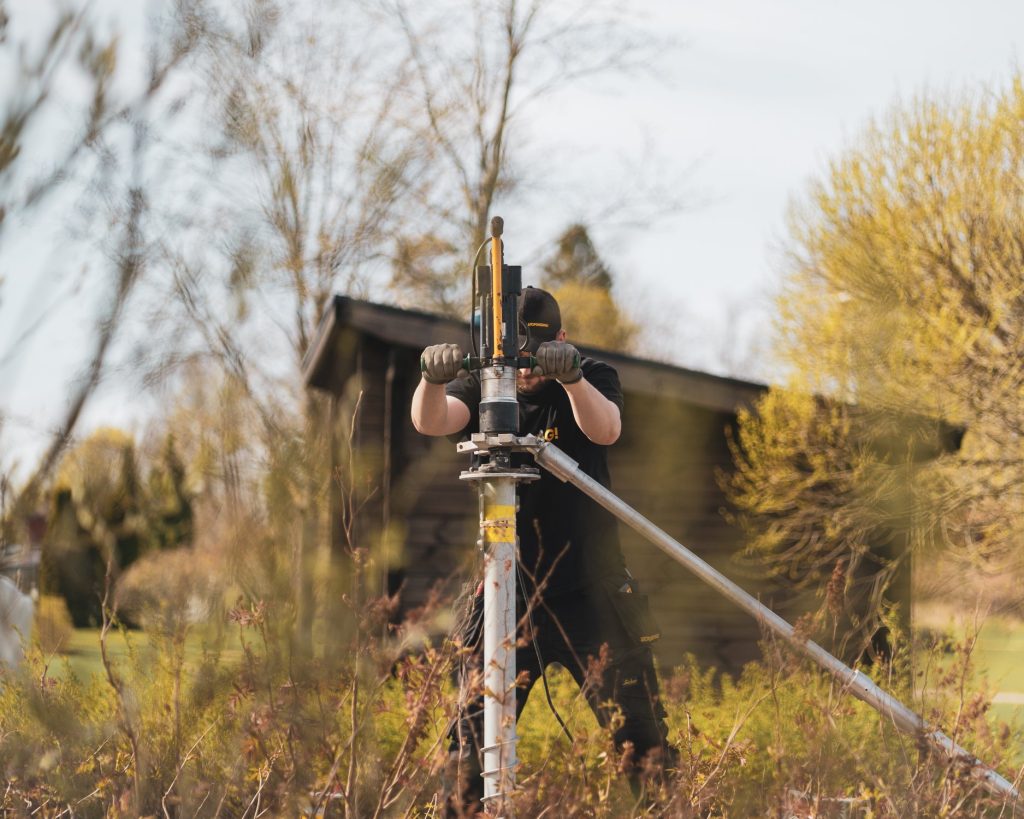
A man installing ground screw foundations by machine in sunny weather. An outbuilding in the background.
With a machine, a ground screw foundation is easier to install, and there is enough torque even if you hit stones.

2. Pier foundation

A pier foundation is the most common way to lay the foundations for leisure buildings and garden buildings. Piers do not require extensive groundworks, and installation is usually easy since the foundation area is small.

Building a garden sauna on piers allows good ventilation under the building. This is a big advantage for moisture control in sauna buildings.

Pier foundation requires frost insulation whenever the soil is susceptible to frost heave. When the frost insulation is done carefully, a pier foundation is an excellent option even on frost-susceptible soil.

When building on bedrock or sandy soil, no frost insulation is needed. On bedrock, the piers can also be set directly on the rock, and no separate concrete footings are needed to support the foundations.

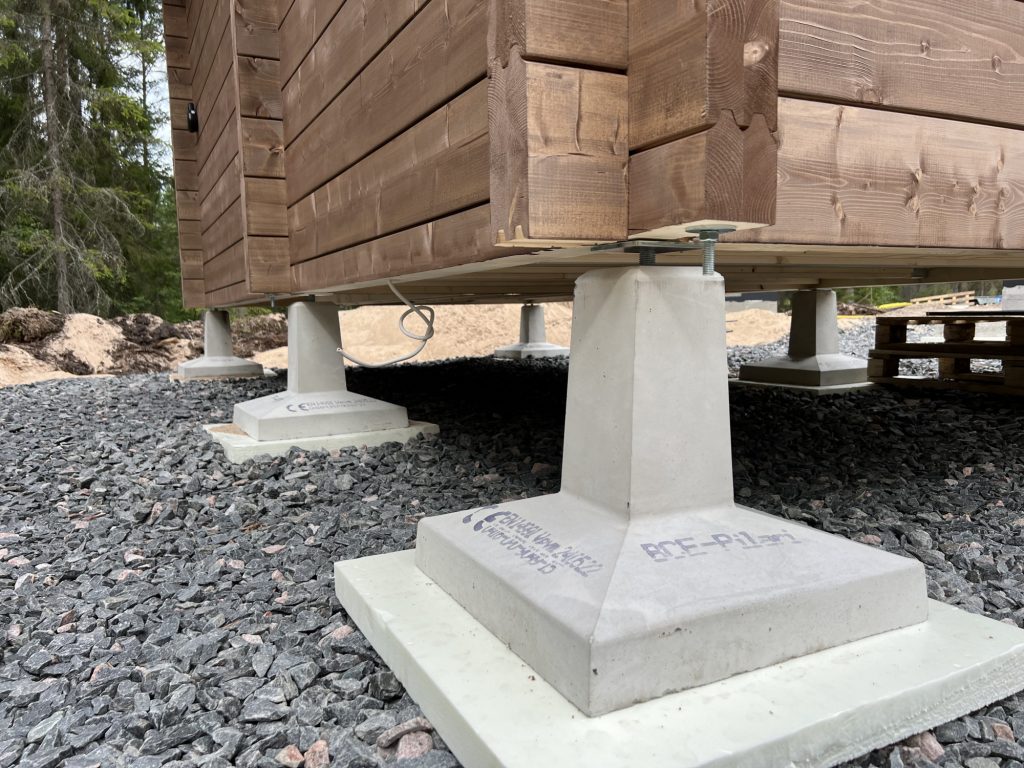
Based on our experience with more than 1 600 log buildings, most of our customers find that the BCE pier, for example, shown in the picture below, is the easiest way to build the foundations for a garden sauna or sauna cabin.

Suitability:

+ Suitable for all soil types with frost insulation. (Organic material must be removed from underneath and replaced with gravel/sand.)
+ A particularly easy solution for frost-stable ground and bedrock.

Construction:

+ Inexpensive if you do it yourself.
+ Good load-bearing capacity, sturdy and durable

– Requires opening up the ground and frost insulation.
– Groundworks usually need an excavator, which adds to the cost.

Options and costs:

  • BCE ready-made foundation pier
    • The BCE pier is a ready-made concrete pier that widens towards the bottom and needs no separate footing.
    • An adjustable post base sits on top of the pier.
    • The price is approx. 60–70 € each
  • Block pier
    • A block pier consists of a reinforced concrete footing with pier blocks stacked on top of it. The hollow centre of the pier blocks is reinforced and filled with concrete. An adjustable post base can be added to the block pier during casting.
    • Price approx. 30–40 € each
  • Cast-in-place concrete footing and pier
    • The pier can also be cast entirely from concrete on site. In this case, a mould is made for the footing and pier, which is reinforced and filled with concrete. An adjustable post base can be fitted on top of the pier.
    • Price approx. 30–40 € each

The total cost should also include any excavator work, crushed stone and frost insulation.

Foundation pier of the sauna cabin photographed from the corner. The building remains raised off the ground, which enables good subfloor ventilation and moisture management.
The BCE pier is a popular choice for the foundations of a cabin or garden sauna.

Tips for dimensioning the foundations:

The foundations must always be built precisely to the building's dimensions. When building foundations for a prefabricated cabin or sauna, pay particular attention to dimensional accuracy.

Prefabricated buildings are made to precise dimensions, and the same is required of the foundations. Otherwise, lowering the sauna or cabin onto the foundations simply will not work.

  • The dimensions may deviate by no more than ± 20 mm horizontally and ± 5 mm vertically.
  • If you use adjustable foundation piers, they make it easy to adjust the last few centimetres to the same level.
  • Check that the foundations are square by measuring the diagonals – in other words, once you have made sure that opposite sides of the foundation are equal in length, you also measure that both diagonals* are the same. When all these measurements match, the corners of the foundation are square, that is, at a 90-degree angle.
    *The diagonal is the measurement from one corner of the building to the opposite corner.

Tip: When building the foundations, also plan for a drainage pipe for stormwater if one is needed.

Floor plan of the sauna cabin and the deck in front of it, also showing the locations of the foundation piers.
The floor plans of a prefabricated cabin show the positions of the foundation piers. On dimension drawings, measurements are usually given in millimetres.

How to build the foundations for a cabin or garden sauna yourself

Cabin foundations are often ordered ready-made, which is an easy and reliable choice. You can also build the foundations yourself, especially if you have some previous building experience.

With prefabricated saunas and cabins, you need to be especially careful that the dimensions are accurate.

Below you will find instructions for building the two most common foundation types yourself.

Build a pier foundation yourself – video and step-by-step instructions:

  1. Mark out the position of the building and the level with stakes and string lines. A spirit level and a laser are also useful tools for this.

  2. Dig away the topsoil to a depth of at least 50 cm. We recommend an excavator for this stage, but if the building is small and the ground not too difficult, it can be done with a spade.

  3. Lay filter fabric at the bottom. The fabric stays between the subsoil and the fill so that the soils do not mix over time.

  4. Put coarse crushed stone / gravel in place of the removed soil, in layers of about 15 cm. Use a spade, a rake and a board about 1.5 metres long to help level it.

    Level and compact the ground carefully. A hand tamper may be enough to compact the ground for a small building, but as a rule we recommend hiring a plate compactor, to make sure the ground is compacted sufficiently.

    (Ask about hire at hardware stores, for example. The price is usually 40-60€ / day).

  5. Make sure the ground is level using a spirit level or a laser.

  6. Lay insulation boards over the entire building area, extending about 1.5 m beyond the sides of the building. The frost insulation is 10–20 cm thick, depending on the climate at the building site.

  7. Add 10–15 cm of crushed stone on top of the frost insulation. Compact carefully so as not to break the boards (light vibration or compacting by hand is enough).

  8. Check the levels once more – in other words, make sure that all the pier positions are at the same level. Use a laser or a spirit level and a string line. Be precise when finishing the ground surface!

    If you are unsure whether the ground is level enough, use height-adjustable foundation piers, so that you can still fine-tune the height afterwards.

  9. Cast the footings and piers yourself, or set ready-made foundation piers in place. Make sure there is enough ventilation space between the finished building and the ground, usually 20 cm.

    The size, height and number of piers are given in From the foundation measurement drawing provided by Ehta. Ehta provides ready-made, clear instructions for building the foundations once the soil structure is known.

Build a ground screw foundation yourself – video and step-by-step instructions:

  1. Mark out the position of the building or screw piles on the ground, for example with stakes or spray paint. The number of piles depends on the size and weight of the building. If you buy your building from Ehta, we will provide foundation drawings showing the correct number and exact placement of the piles.

  2. Make sure the dimensions are accurate. Remember to also check the diagonals (see above) so that the corners are square.

  3. Remove the soft topsoil, such as humus and peat, at the screw positions. If necessary, lay filter fabric and a thin layer of crushed stone in its place. If the ground is loose, this makes installing the screw easier.

  4. Install the screws either by hand or with a purpose-made machine.

    1. How to install a ground screw foundation by hand.

      Installing by hand is only recommended for small buildings and easy ground with no stones.

      Instructions: Insert the installation bar through the upper holes of the screw. Two people turn the bar round while pressing the screw downwards. Check that it is vertical with a spirit level every now and then during installation. Continue until the screw is below the frost line. (Check the frost depth in your area!)

    2. How to install a ground screw foundation by machine.

      Hiring a ground screw machine costs approx. 80€/day.

      With a machine, a ground screw foundation is quicker and easier to install than by hand. The machine also has more torque if stones get in the screw's way. However, ground screws cannot be installed in ground containing large stones, even by machine.

      Instructions: First read the machine's operating and safety instructions. Start the machine, place the screw in the chuck and press down while drilling. Check that it is vertical with a spirit level every now and then. Continue until the screw is below the frost line.

  5. Check the levels, i.e. that the tops of the screws are at the same level. You can also use height-adjustable post bases to fine-tune the last few centimetres.

K-Rauta's video on a ground screw foundation for a deck  works just as well for laying the foundations of a garden sauna with hand-installed ground screws.

Paalupiste's video gives a good overview of different ground screws, how they are installed and what they are used for.

Detailed instructions and drawings for building the foundations from Ehta

  • Do you need help, more detailed instructions or further information about garden sauna foundations?
  • Are you interested in buying a sauna or another prefabricated building?

Ehta is a company that makes prefabricated saunas and cabins from Finnish log. Ehta is particularly known for its good value for money and warm, knowledgeable customer service.

Our people are enablers and designers – not salespeople.

Share article:

Explore our diverse collection and find the perfect solution for your garden at home or your holiday cottage:

FI | EN | SV

We’ll call you at a time that suits you

We don't have any salespeople...

but enablers and designers.

Deal with Ehta the way you want, at your own pace.

Our job is to help you find the best solution for you.

You deserve the best moments in the steam of a log sauna! 

Short on time right now?

Would you like to explore the collection later or keep up to date with the latest tips and offers?